
Using the MyNMU Registration System
Registration for the fall semester takes place in mid-March, as does registration for the summer sessions. Registration for the winter semester begins in late October each year. Specific registration times/dates are posted on the Registration Week Schedule and assigned based on credits earned.
Registration Period Start Dates
The start date for registering for a fall or winter semester courses varies based on how many credits you have earned. Students are assigned registration times and dates for the fall and winter semesters; the summer sessions have open enrollment. Registration begins with graduate, post baccalaureate, seniors and vocational students. Juniors, sophomores and returning freshmen follow. Your assigned registration time is based on your class standing and how many credit hours you have earned. The designated registration dates and times are e-mailed to currently enrolled students one week prior to registration. Registration dates and times are also posted on the Registration Week Schedule and available on MyNMU.
New freshmen and transfer students register for first semester courses during the new student orientation program.
Registration Holds
Students are encouraged to review any holds on MyNMU under the Registration tile:
“Preparing for Registration” section now so that they have time to address any holds that may prevent them from registering at their scheduled start time. Registration Holds that could affect registration will be reviewable on MyNMU the week prior to registration.
Registration Instructions
Students normally register for courses using their MyNMU account. Prior to actual registration, you can review which courses are being offered for the upcoming semester by going to the MyNMU Registration tile and selecting “Browse Classes”.
Registration Instructions
Complete Registration Instructions (PDF 4 pages)
- Log in to MyNMU;
- Click on the Registration tile;

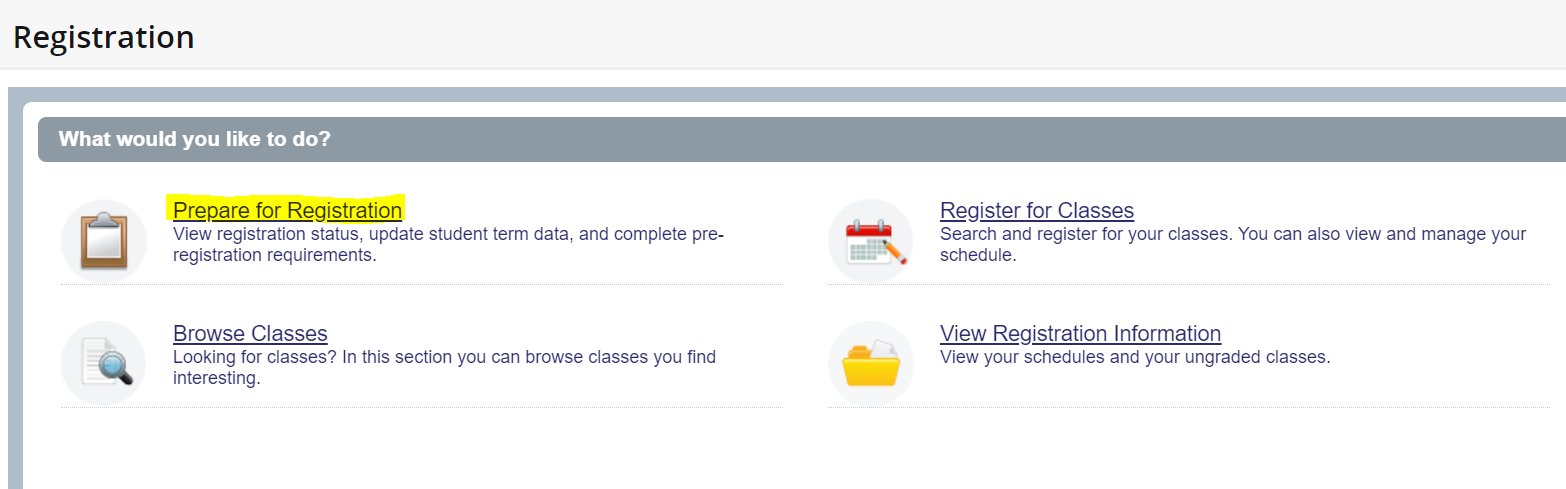
The registration screen has four links:
Prepare for Registration: View your registration status, hold information, earned hours, and assigned registration time.
Register for Classes: Use this link when it is your assigned day and time to register.
Browse Classes: Use this link to prepare for registration by browsing the course listings.
View Registration Information: View your past registration information and schedule.
- To register for classes, click the Register for Classes link;
(You may be asked to sign in again through the single sign on) - Select the term you are registering for, and click continue;
- The new registration screen is divided into three panels:
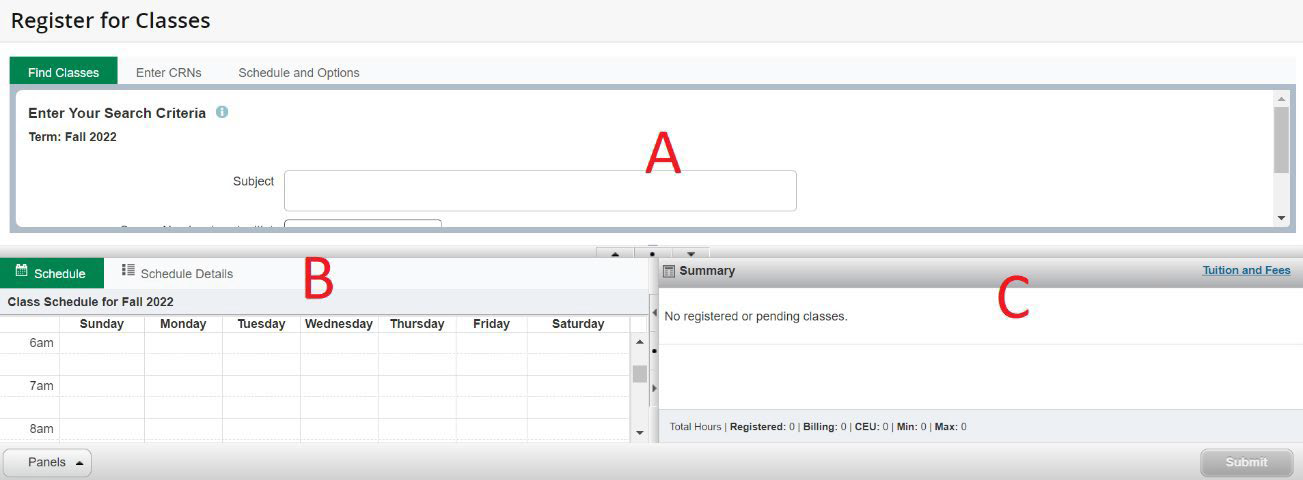
In section (A) there are three tabs, “Find Classes”, “Enter CRNS”, and “Schedule and Options”
In section (B) you will find schedule information. You can view your schedule in either a calendar or list view.
In section (C) is a summary of your registration. Here you can submit and register for courses you’ve selected and also waitlist, or drop courses.
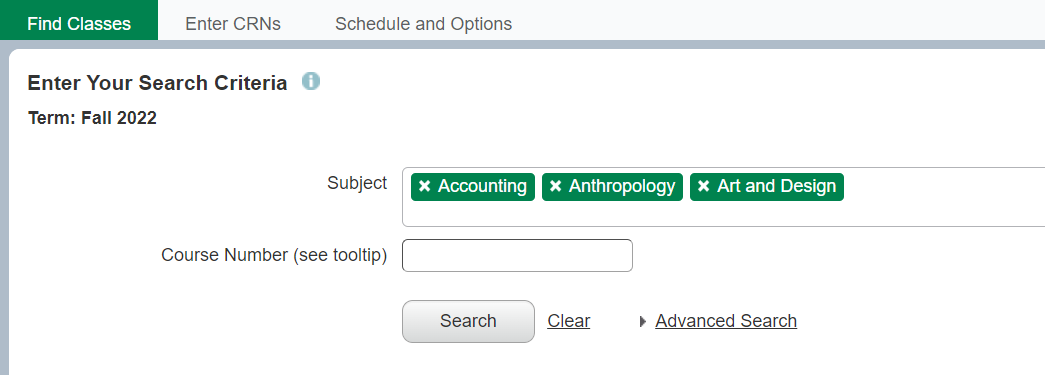
- To Register for a course either perform a search or enter the course CRN.
- To perform a search, in section (A) select a single subject or multiple subjects to search for all courses offered by those subjects. If you have a specific course in mind, you can type in the course number. Once you have the information entered, click the search button.
- After a search you can review all of the available options. You can adjust the filter options by clicking on the categories in the first row (1), or by clicking on the gear icon (2). You will not be able to “Add” a course that is full, or only has reserved seats available. If you want new results, click on the Search Again button (3).

- Once you find a class that works, click ADD. It will then be added to your summary (section C)

- Your classes will remain “Pending” until you click Submit. All classes with the action “**Web Registered**´that are submitted will attempt to register. There are a few other options you will find here, remember you have to submit for the decision to be official. If you leave this page without submitting, your work is lost.
i. Remove will remove the course from the summary
ii. Waitlist will waitlist the course (if you are invited to register for a waitlisted course return to this screen and change Waitlist to Web Register)
iii. Drop Using Web will drop you for the course.
iv. You will not see a withdraw option, you must visit the Registrar’s Office or Student Service Center to withdraw from a course. Check online for the add/drop/withdraw schedule. - After you click Submit for a new course it will either Register or show that there are errors. Errors pop up bright red.
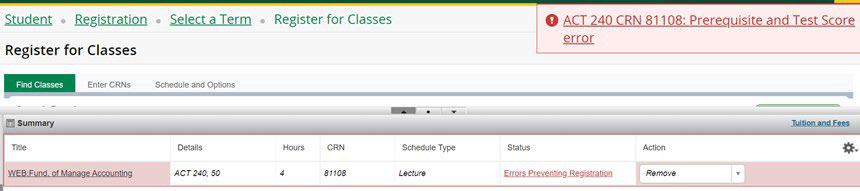
- If you have an error, the notification on the top right will tell you the issue. You will not be able to register for the course until you resolve the error.
- Work with your adviser if you need help working through errors.
- You will see the status “Registered” if you have successfully registered for the course. If you need to later drop the course, you would take the action “Drop Using Web” and click submit.
- Repeat these steps until you have created your schedule.
Image

Registration Tips
Want more course information?
- All of the course titles are hyperlinks with additional course description information.
- Included in the course description are important notes about the class.
Common Errors
Prerequisite: A prerequisite course is a course that is required prior to taking a course. If you receive that error, you are missing a prior course. You can view course requirements by viewing courses in the bulletin.
Class Level: The course likely requires Junior or Senior status, this is measured in credits not years. Junior status begins at 56, and Senior status at 88.
Link Course: Some courses are “linked” together. A lab section is often linked to a lecture course. To successfully register, you will need to register for both linked sections.
FAQ:
I think my registration date/time is wrong?
Your registration date/time is based on your earned hours. Earned hours does not include the courses you are currently registered in.
I can’t view the future semester?
Access to a new semester begins shortly before the registration period (1-2 weeks). I can’t add or drop a course? Review the add/drop schedule.
Do You Have a Registration Hold?
You can find out if you have any registration holds on MyNMU by following these directions:
- Sign in to MyNMU.
- Click on the Registration tile:

Click the Prepare for Registration link:

- Choose the semester.
Your registration date/time hold may be displayed to prevent you from registering early. Any other administrative holds listed need to be addressed and removed before you can register. You can learn about the various types of holds here.
To have the registration hold removed, contact the university office or department that placed the registration hold. Only the office or department that placed the registration hold can lift the hold.
Guest Student Registration
NMU Students
NMU students who wish to attend another institution as guests must complete a guest student application, available on the Web or from the Registrar's Office. Students must complete this form prior to enrollment at another institution. Students who fail to follow this procedure assume full responsibility for the transferability of courses.
Students should also request that an official transcript be sent to NMU after completing the course work at the guest institution. This is not done automatically!
Guest Applicants to NMU